Pika Art 1.0: A Complete Guide
Introduction
I was finally granted access to Pika Art 1.0, so I thought I’d make an update about it. A lot has changed, so instead of just giving you a short update, I decided to create a comprehensive course on Pika Art 1.0.
For now, this is still free, but I’m pretty sure that it’s going to change somewhere in the future, and it’s going to be the near future as far as I can tell. But for now, all you need is to sign up either using Google or Discord.
When you’ve already signed up for an earlier version of Pika Art Beta, you can use the same account. Just use your Discord, authorize it, and then you will be part of the waiting list.
For me, it took a while until Pika Art sent me a confirmation email that granted me access. I’m not a big YouTuber. If you’re bigger than me, they might send it within days, maybe even hours. But if you don’t have any following or only have a small YouTube channel, be prepared that it might take a week, two weeks, maybe even a month. I think for me it was close to a month. But when you finally have access, here’s what it looks like.
How to Generate a Video
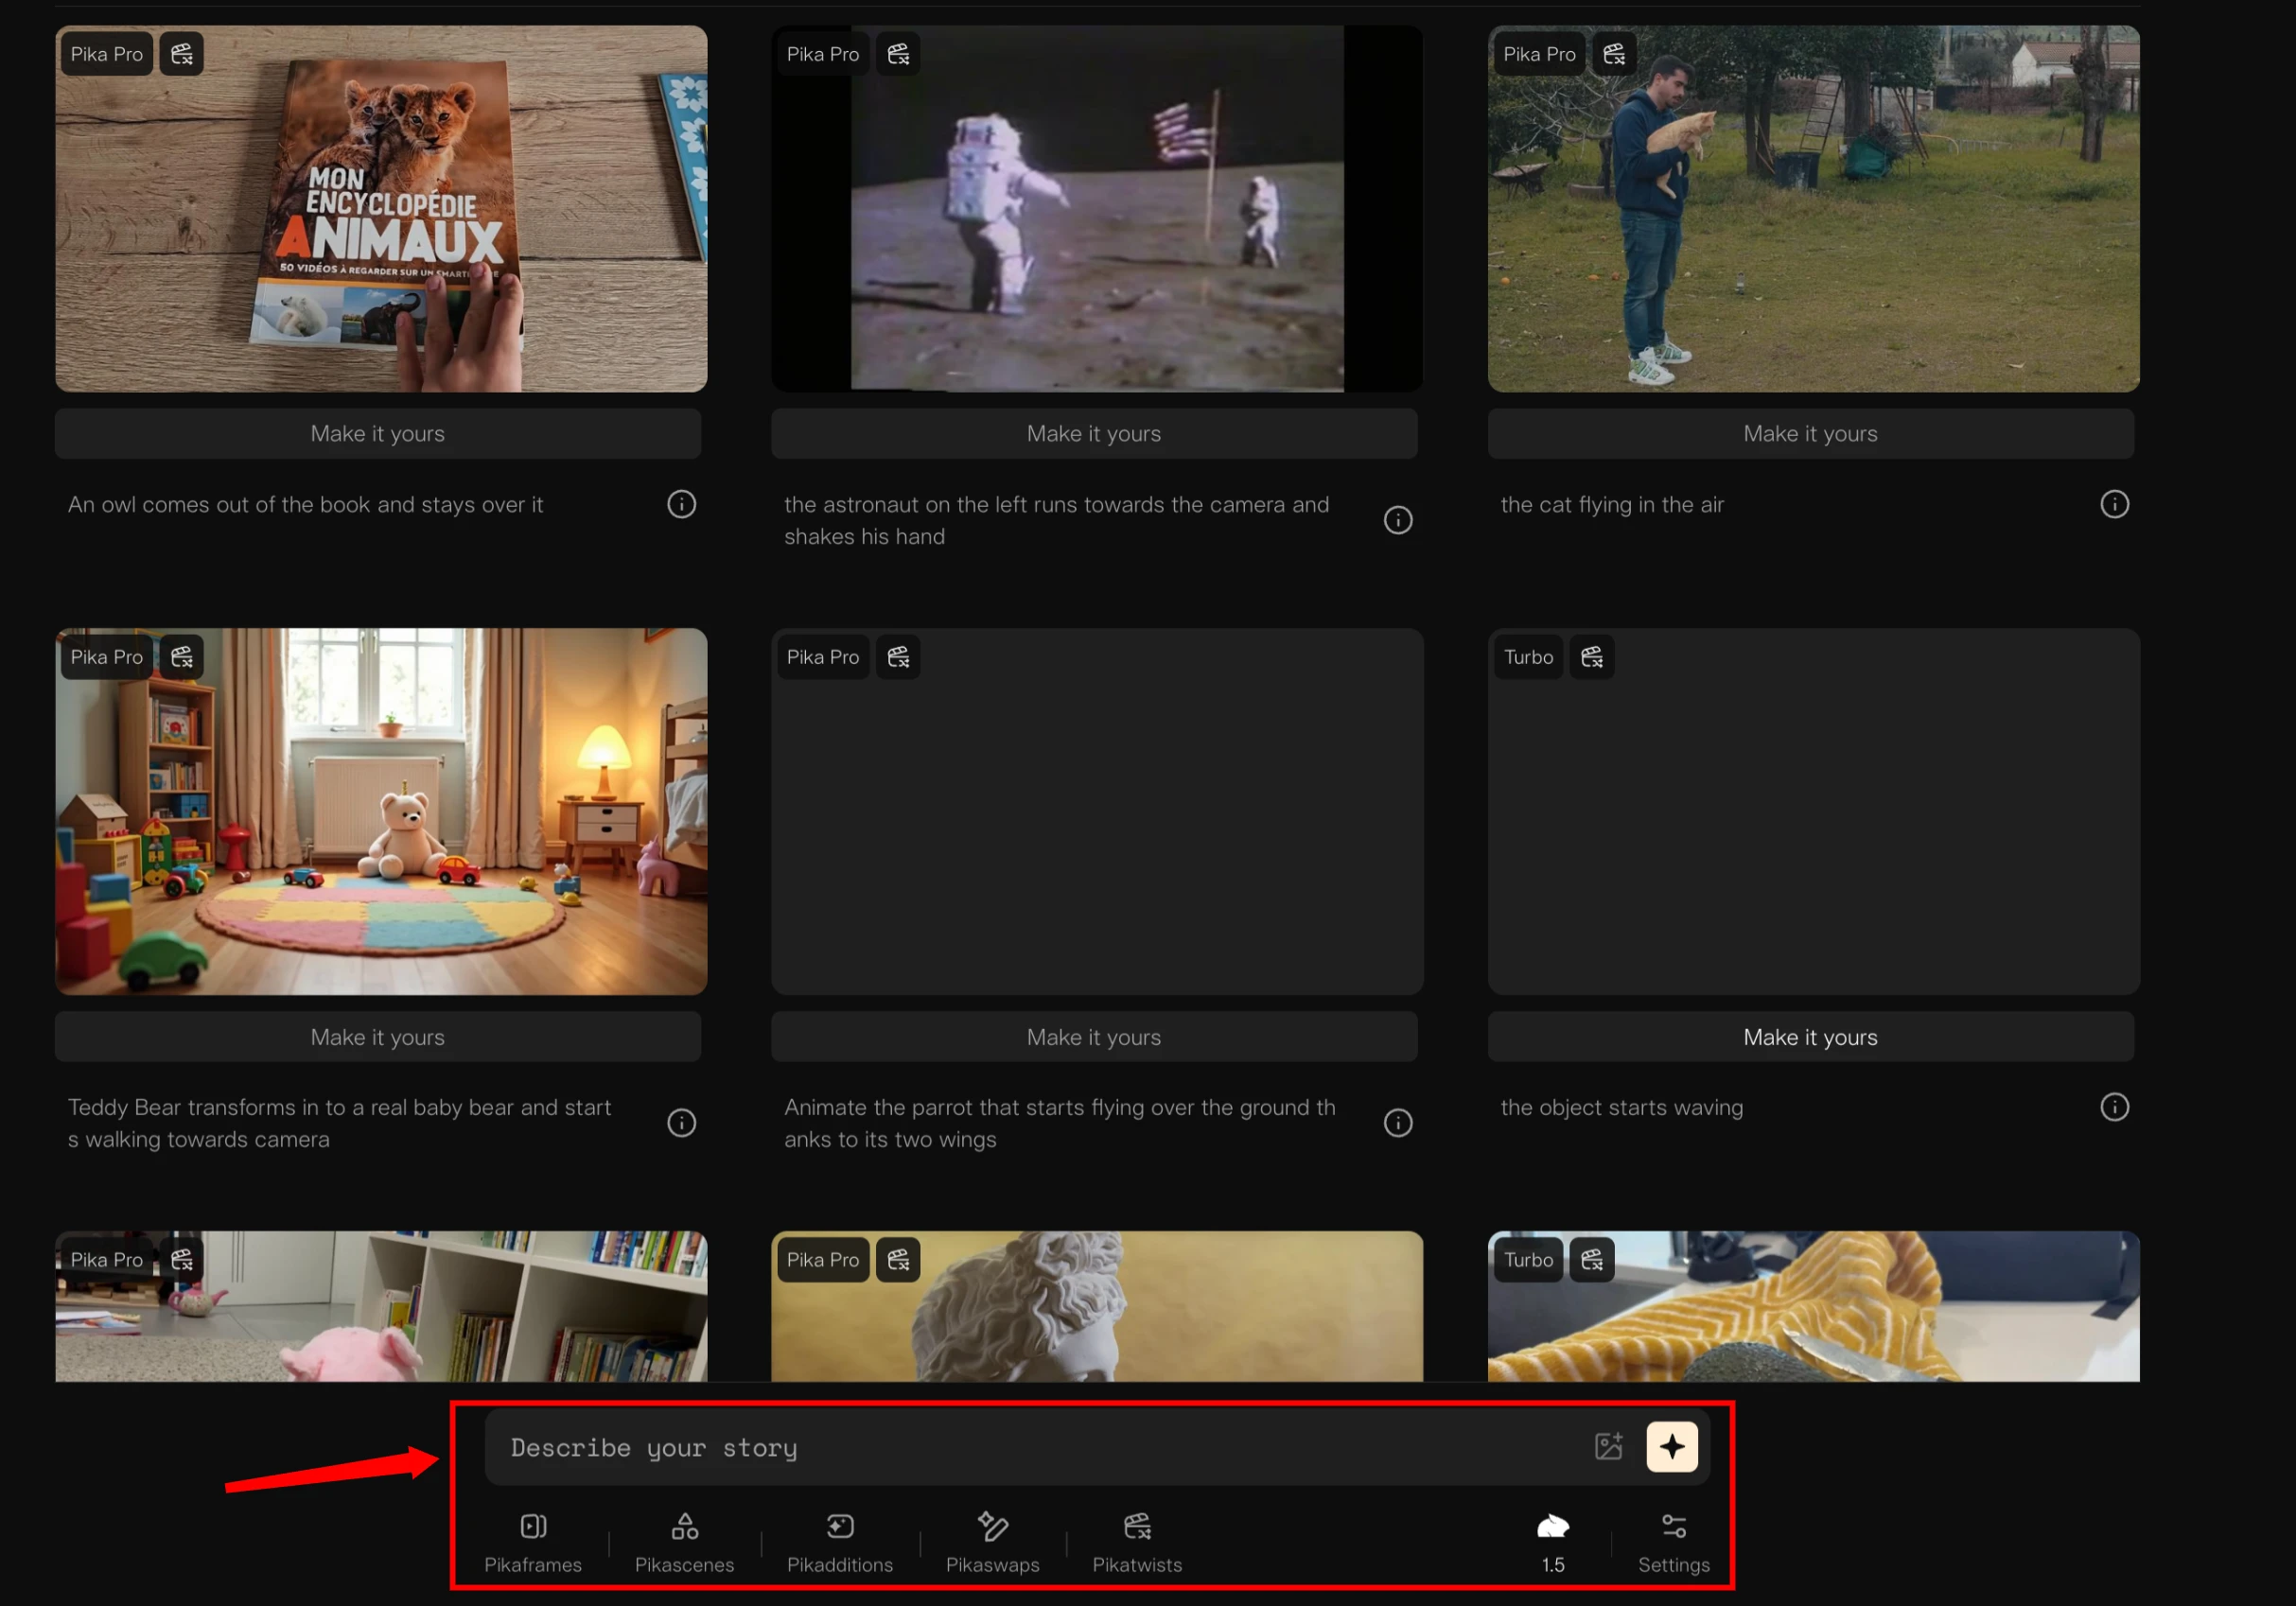
We’re not on Discord anymore. Instead, we are now on the Pika Art website. You’ll see Explore and My Library.
It doesn’t collect the old videos that you created on Discord, so I started here with a blank library. For everyone who’s totally new, I’m going to design this guide from the perspective of someone who has never seen anything related to Pika Art.
On Discord, we used commands. Here on the website, you don’t have to. You can simply write your prompt right here and describe your story — no need for any commands.
Example: I tried “pixel animation style running dog” and confirmed it via a left click on the little icon. It then switched to my library, where I could see the current in-progress project.
Usually, it takes 30 seconds to a minute for a project to be fully generated. Sometimes longer, sometimes faster, but this is usually what you should expect.
Once it’s done, you can hover over it, and it runs directly. You can:
- Download it from the top right of the preview window.
- Delete it if you don’t need it.
- View in fullscreen.
- Use Retry, which regenerates using the same prompt.
- Use Reprompt, which highlights the project, adds its prompt back in the prompt bar, and allows adjustments.
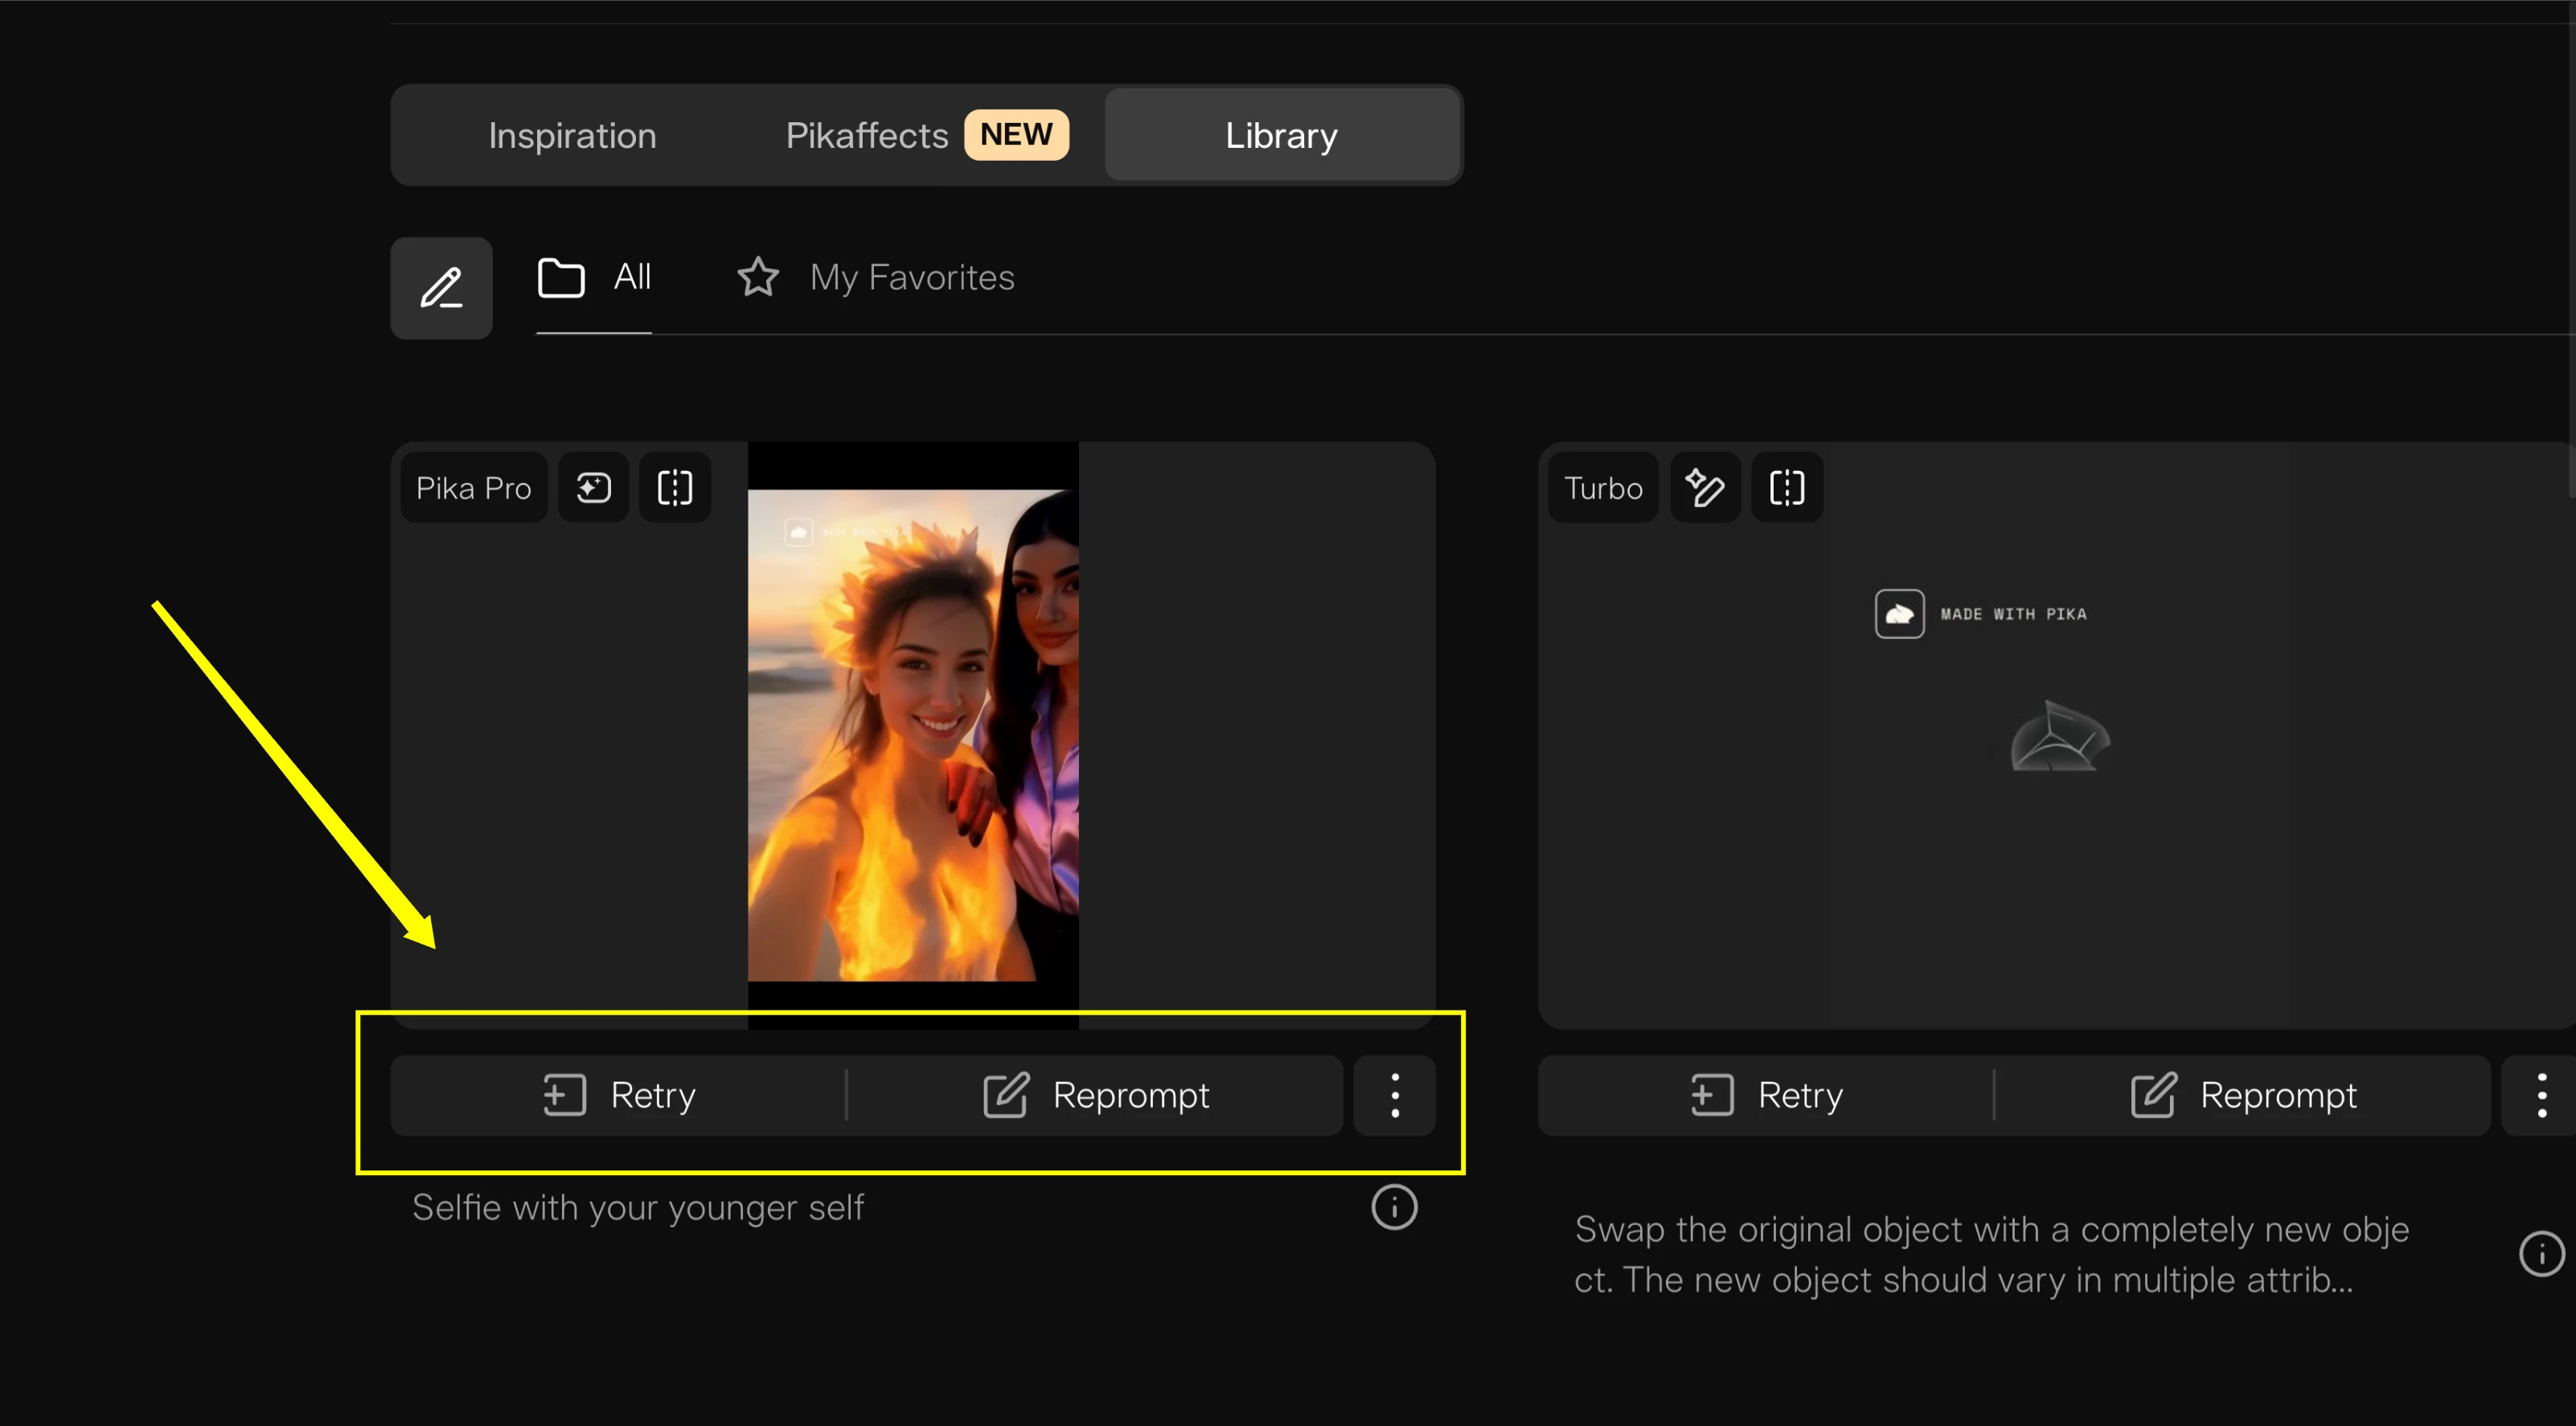
The difference is:
- Retry → same prompt, regenerates.
- Reprompt → recalls prompt + parameters + references.
Exploring Pre-Built Prompts
Under Explore, you can try out existing prompts.
For instance, I tried the lighthouse project. It used the same prompt, the same parameters, and even reused resources like image or video references.
- Default length = 3 seconds.
- Lighthouse prompt length = 7 seconds.
You can extend videos in Pika Art 1.0 using the Add 4 Seconds parameter.
Using Image References
Another way to create a video is by using image references.
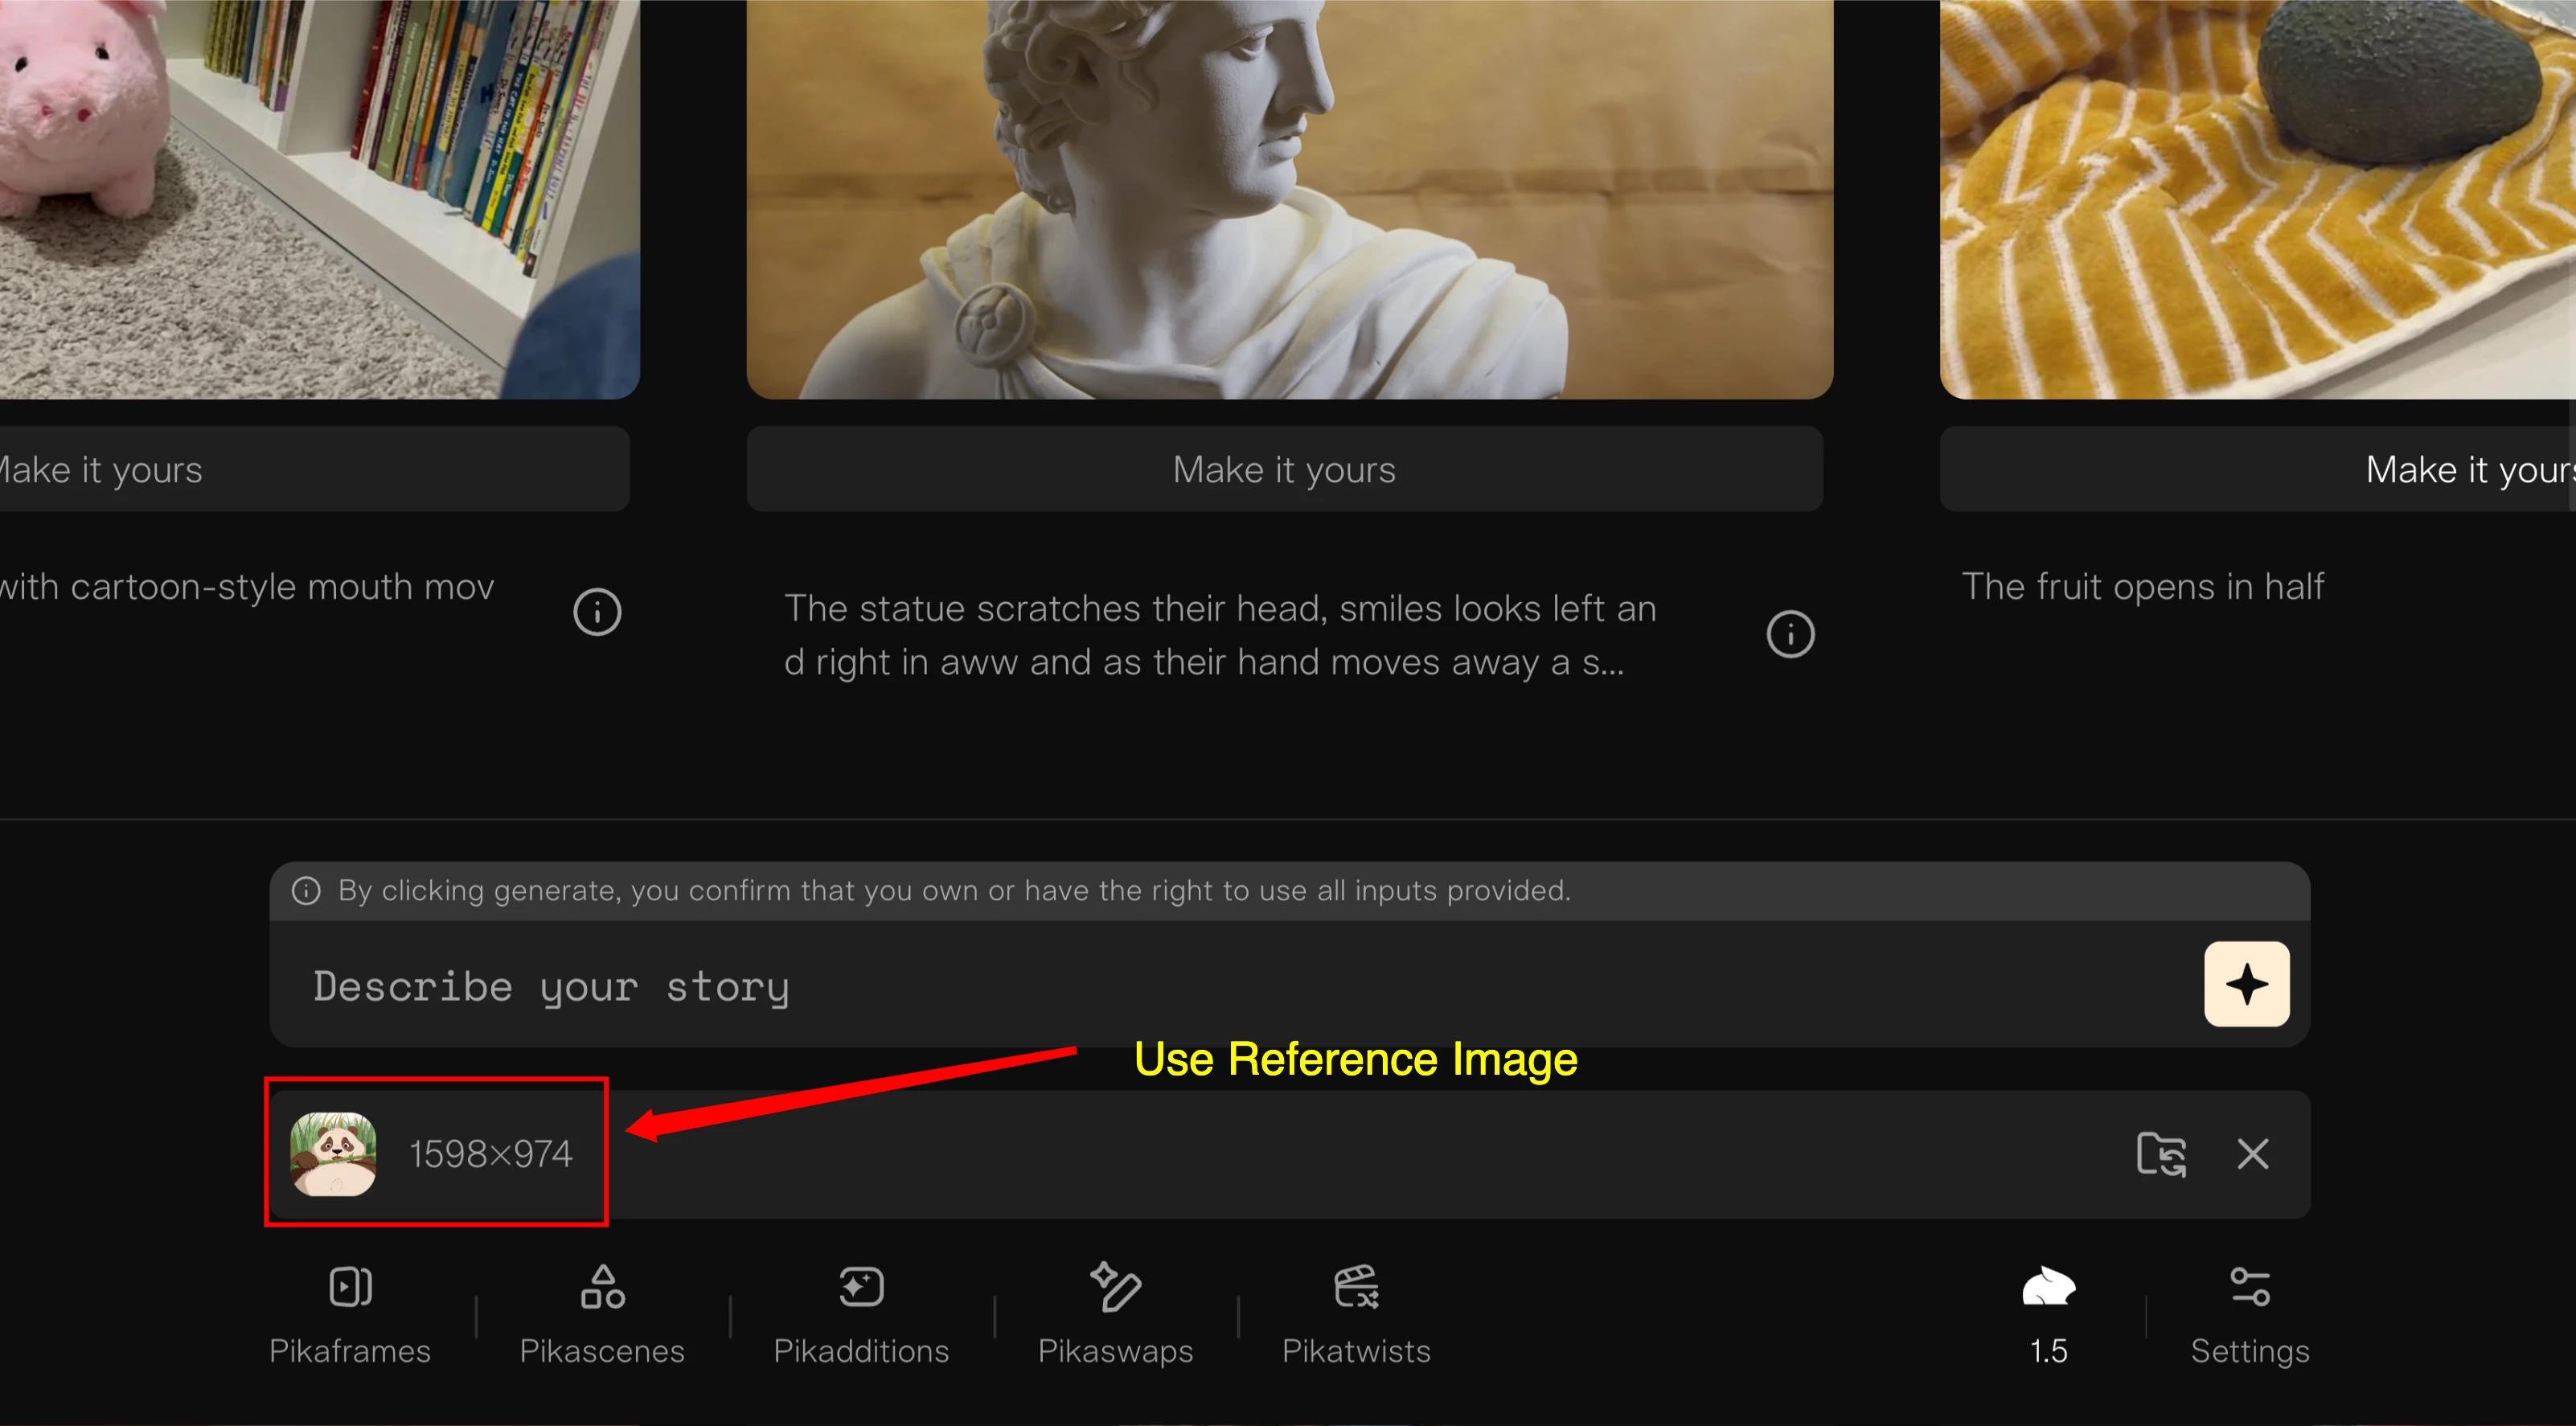
- Click the image/video attachment icon.
- Upload an image.
- Confirm without describing the story → your image becomes animated (default: 3 seconds).
Example: I uploaded a funny cute monster image. It was turned into a 3-second animation.
You can also:
- Leave the story empty → Pika Art animates the image naturally.
- Add a description → sometimes works, but can conflict with the image context.
Example: Adding “cute monster dancing” didn’t work well because the reference was a laughing monster, not a dancing one. The animation made the laughter bigger but lost the original reference.
Lesson: Leave prompts empty when animating references for best results.
Using Video References
Pika Art also allows video references.
- Files must be under 10 MB.
I tested with a woman walking video. The original was too large, so I downloaded a lower-resolution version to reduce file size.
When you leave the prompt empty, Pika Art transforms the reference freely. For example, a real-life clip of a woman walking was turned into an anime-style version. Another try made it more realistic but still animated.
If you want specific results, write specific prompts. Otherwise, Pika Art takes creative freedom with movements and characters.
Video Parameters
You no longer have to type parameters into prompts. On the website, you can directly adjust them:
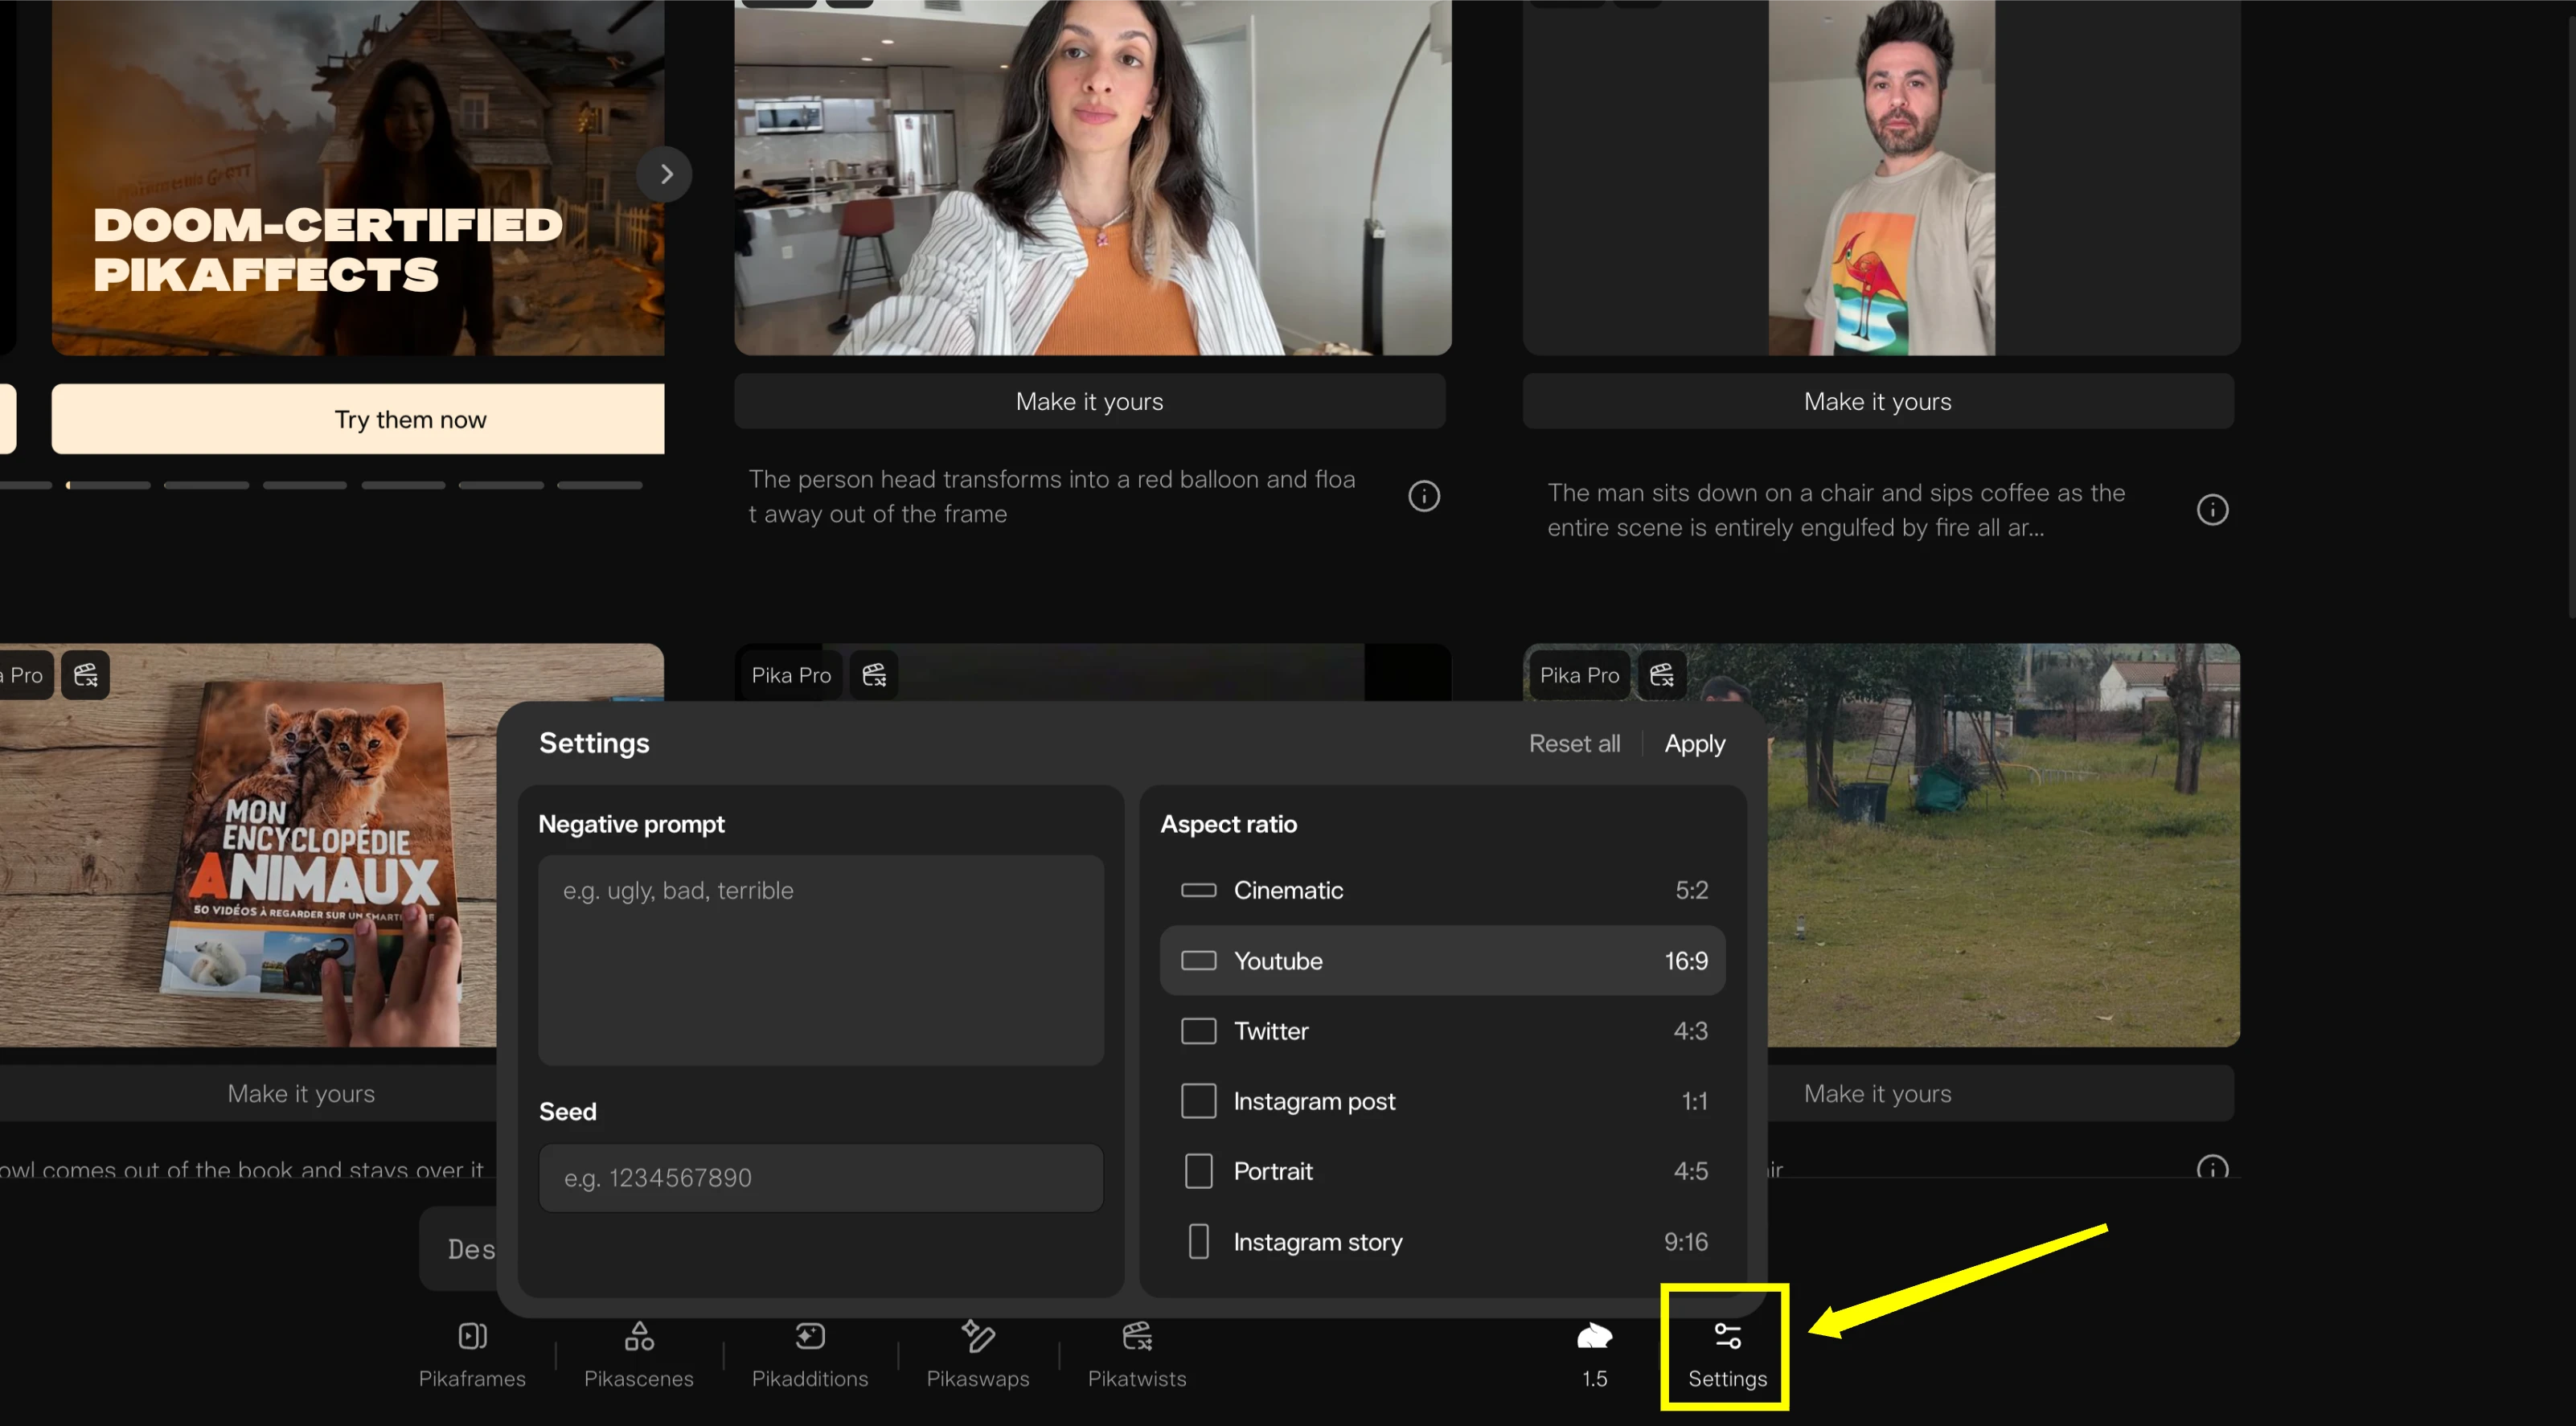
- Aspect Ratios: By default 16:9. Options available: 1:1, 4:3, 9:16, 3:2, etc. (no custom ratios yet).
- Frames per Second (FPS): Default 24. Lower FPS gives a stop-motion effect.
I tested with a Pixel Style Samurai in TikTok format (9:16). I compared:
- 24 FPS → smooth result.
- 8 FPS → stop-motion effect.
You can also access detailed Info (eye icon) which shows:
- Parameters used.
- Seed number (important for consistency).
Motion Control
Pika Art allows camera movement using motion controls:
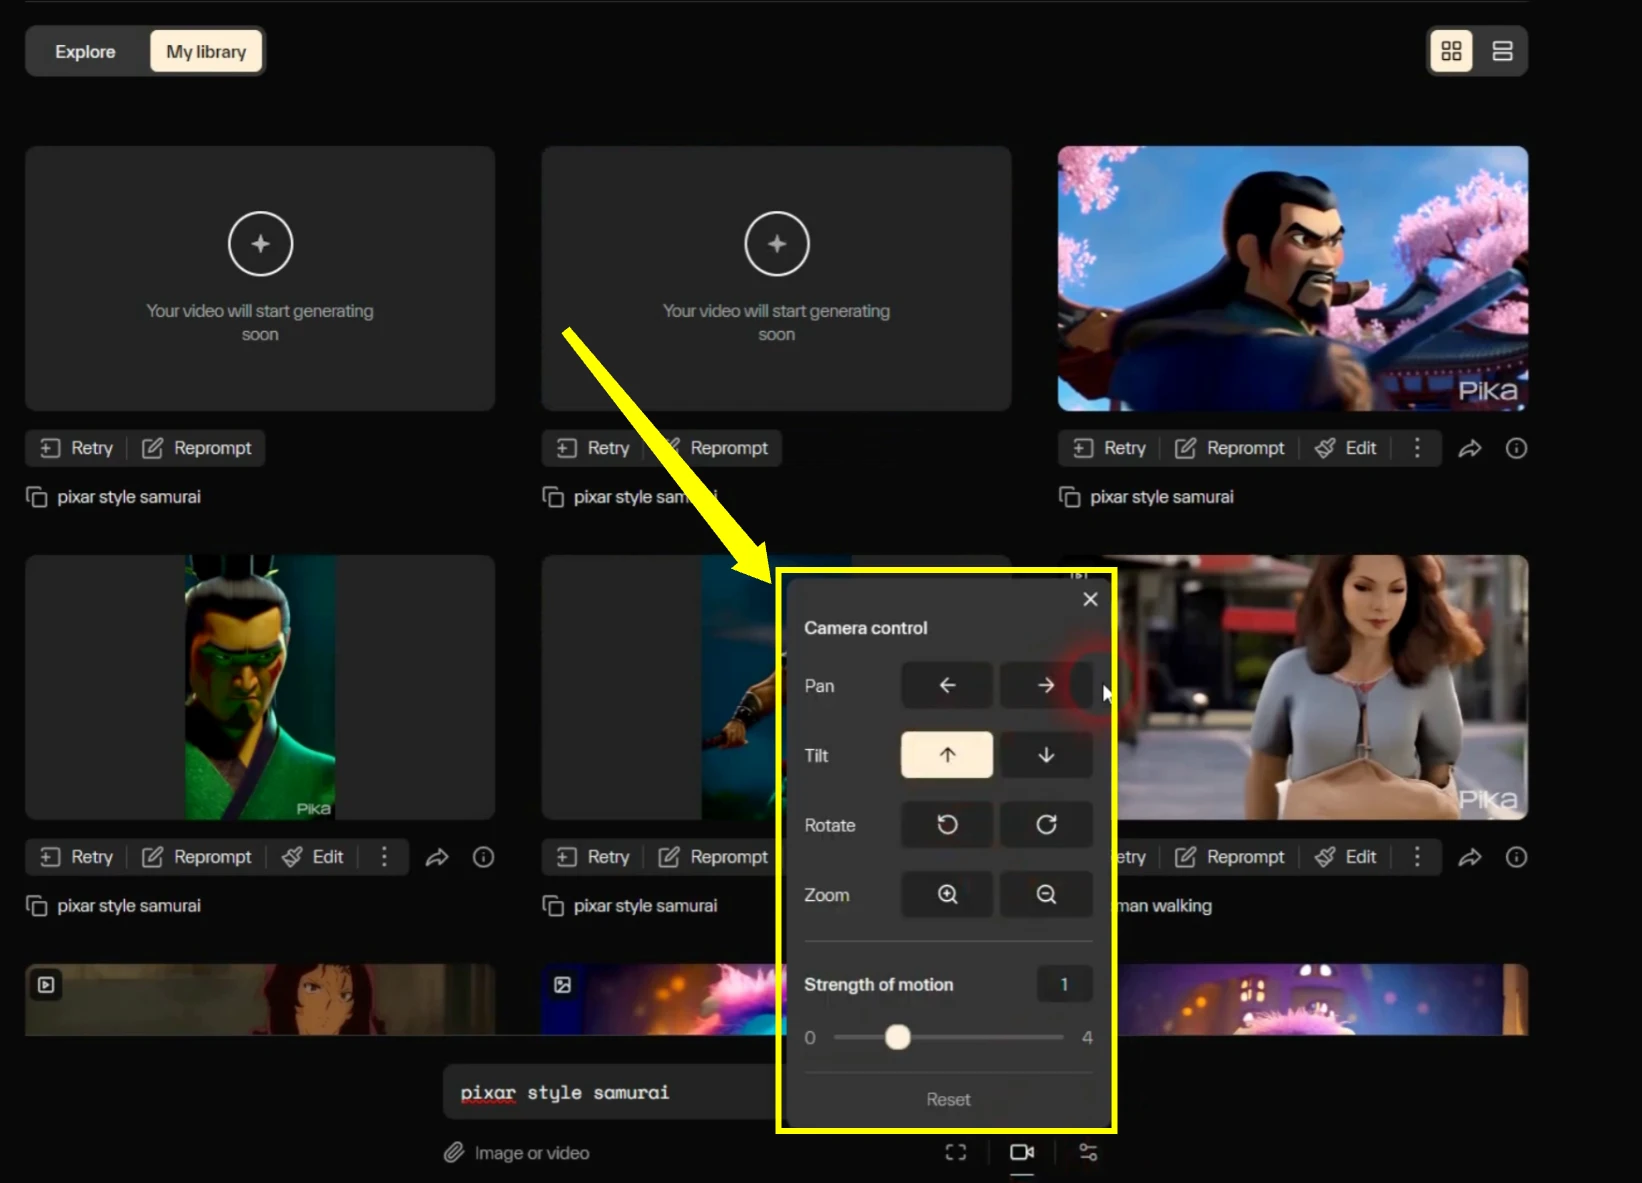
- Pan (left, right).
- Tilt (up, down).
- Rotate (clockwise, counterclockwise).
- Zoom (in, out).
You can also combine movements, but combining too many often gives inconsistent results.
Example outcomes:
- Pan left → worked clearly.
- Tilt down → looked more like zooming out.
- Zoom in → sometimes failed.
- Zoom out → worked occasionally.
- Combined pan + tilt + zoom + rotate → too much, results failed.
Consistency was maintained using the same Seed number.
Editing Functions
Pika Art 1.0 introduces new Edit options:

- Add 4 Seconds → extends video length.
- Upscale → removes noise, improves contrast.
- Negative Prompt → removes unwanted elements (hit or miss).
- Strength of Motion → controls how much the subject moves (0 = none, max = strong movement).
- Consistency with Text → adjusts closeness to prompt.
Expand Canvas (Outpainting)
This works like outpainting in MidJourney.
- Take a clip (e.g., 16:9).
- Place it into another aspect ratio (e.g., 5:2).
- Pika Art expands background to fill new space.
Example: Expanding left and right or resizing to add top and bottom.
Modify Region (Inpainting)
Modify Region is like inpainting.
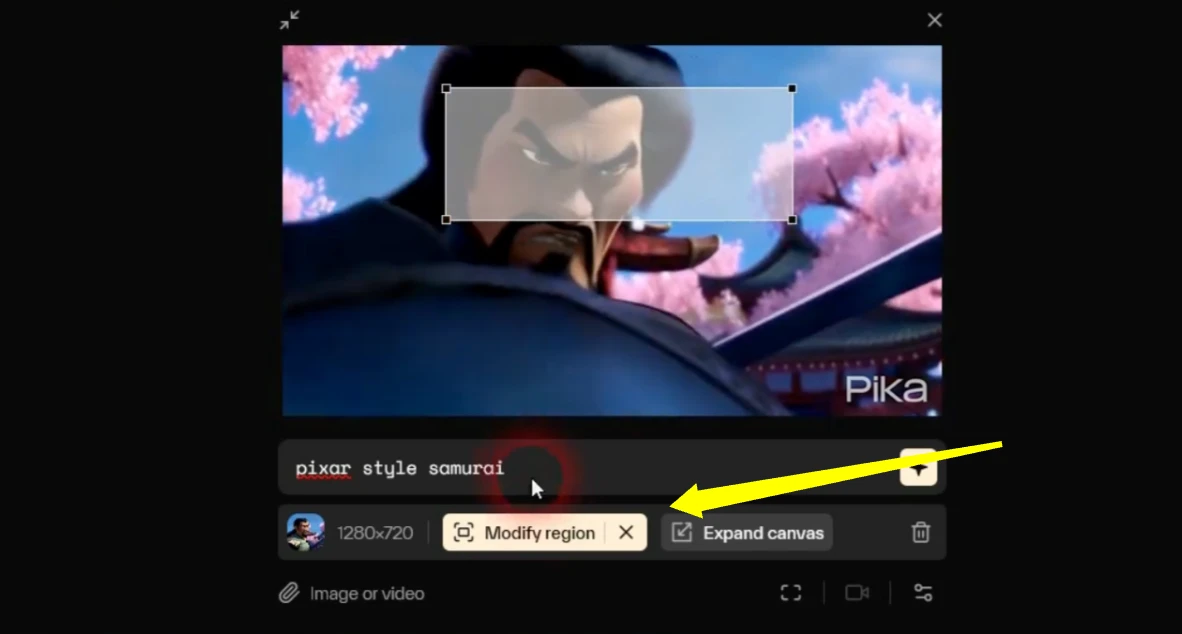
- Select an area (box over part of the video).
- Add instructions (e.g., “add sunglasses”).
- Pika Art modifies that area across frames.
In my test, it successfully added sunglasses to a character in all frames.
Modifying Existing Videos
You can apply Modify Region or Expand Canvas to uploaded videos too.
For example:
- Uploaded woman walking clip.
- Added sunglasses → worked fairly well, even adjusted sunglasses with head movement.
- Tried a Darth Vader helmet → partially worked.
- Expanded canvas with a prompt like “green grass, trees” → gave a dreamy background.
Extending and Upscaling
- Add 4 Seconds: Extends a clip but may lose flow; retry if unsatisfactory.
- Upscale: Improves vibrancy, sharpness, and background clarity.
Final Thoughts
This is just the first version of Pika Art. When you think back to the first version of MidJourney and see how far it’s come (now version six), you can imagine what Pika Art will look like in its fifth or sixth version.
It’s definitely worth checking out. The only question is the cost once they put a price tag on it. For now, you can try it out for free. When pricing plans are announced, that’s the time to evaluate if it’s worth your money and time.